Using API keys to optimize your use of LLMs
This guide demonstrates how to access multiple AI models like ChatGPT and Claude through a single self-hosted interface using API keys, paying only for actual usage. By combining Open Web-UI and LiteLLM, users can switch between various LLMs cost-effectively without multiple subscriptions.
Everybody knows about ChatGPT. The launching of all these new large language models has had a great impact on society. It has in fact been the tipping point, transforming decision trees, machine learning, and artificial neural networks from concepts only interesting to computer scientists into making artificial intelligence a topic of general interest. Nowadays it is impossible to escape AI. The advantages of having access to these LLMs are immeasurable. The demand for these models is large and hard to meet. Getting access to the latest models requires subscriptions to monthly plans. But there are so many models. Does this mean you need a subscription to OpenAI's ChatGPT, another to Anthropic's Claude and X's Grok? No, not really.
What are API keys?
If you are a programmer or work in IT, you are probably no stranger to APIs. Application Programming Interfaces (APIs) are collections of rules and protocols that applications use to interface with other applications: computer program to computer program communication. API keys are cryptographic secrets that you must present to the API to gain authorization to execute certain actions.
LLM providers also expose their models over APIs. This means a programmer could use the documentation to build an application that integrates with an LLM of their choice. Let's say, for example, I want to write a program that generates tags for news articles for an archive system. Well, that is a task that is hard to program, but an LLM could do that relatively easily. I do not have to implement some complex logic to find the tags based on the content of the article; I could simply feed the whole content to, e.g., ChatGPT and get the tags out of that. In that case, I would have to use the API to enable my program to use the LLM's capabilities.
Accessing the API is not free. It has another pricing scheme compared to the traditional way of using LLMs on their website. You do not pay a monthly flat rate, but rather you pay based on how much you use it. If you are only a light user of ChatGPT Plus, for example, you might actually end up saving a lot of money by switching your consumption to the API. On the other hand, if you use it very extensively, then you might in fact end up spending even more than before.
The greatest advantage of using the API, and the two pieces of software that I will present in this blog post, is that you are not bound to a single provider. While I would say it is not reasonable to have individual subscriptions to three or four providers, which each cost upwards of 20 USD, it is perfectly fine to load up some credit and consume over APIs. You can easily switch from one model to another (maybe based on the task at hand) and not pay the full price of a month, but only the price of what you actually consumed.
Mixing and matching your LLMs
Let me tell you about two pieces of software that could enable us to do some interesting things:
- Open Web-UI (https://github.com/open-webui/open-webui)
- LiteLLM (https://github.com/BerriAI/litellm)
Open Web-UI offers a self-hosted user-friendly graphical interface for interacting with your AI models. Out of the box, it supports OpenAI's API and Ollama. The interface is very similar to the tools you already know. It feels exactly like chatting with ChatGPT, Copilot, Claude, etc.
LiteLLM is the real secret sauce of this project. While Open Web-UI does not support interfacing with other APIs, LiteLLM can interface with anything you throw at it out of the box. And the best of it is, it itself has an API that is fully compatible with OpenAI's API. So we can bind any models we want to LiteLLM and then have Open Web-UI be our frontend and connect to LiteLLM's API.
Getting API keys from your providers
The initial requirement would be to set up those API keys from your providers of choice. I will not walk you through generating those keys, but here are some links to get you started.
- OpenAI: https://platform.openai.com/api-keys
- Anthropic: https://console.anthropic.com/settings/keys
- XAi: https://console.x.ai/team/default/api-keys
Installation and setup
I will deploy these two programs using Docker. I will assume you have a working Docker installation and that you know the basics.
LiteLLM
We will use LiteLLM as a proxy that manages the API keys from different providers. The first step on the installation is to download/clone their repository directly from GitHub. If you have git installed, then simply run the following command:
git clone https://github.com/BerriAI/litellm
Alternatively, you will have to download the ZIP with the source code and unzip it. In that new directory litellm, we need to create a new file called .env and add the following content to it:
LITELLM_MASTER_KEY="sk-<SOMESTRING>"
LITELLM_SALT_KEY="sk-<ANOTHERSTRING>"
Store the master and salt key safely. Now, spin up that compose file with the following command:
docker compose up -d
Now open your browser to the IP of your server and port 4000. You should see a window like this:
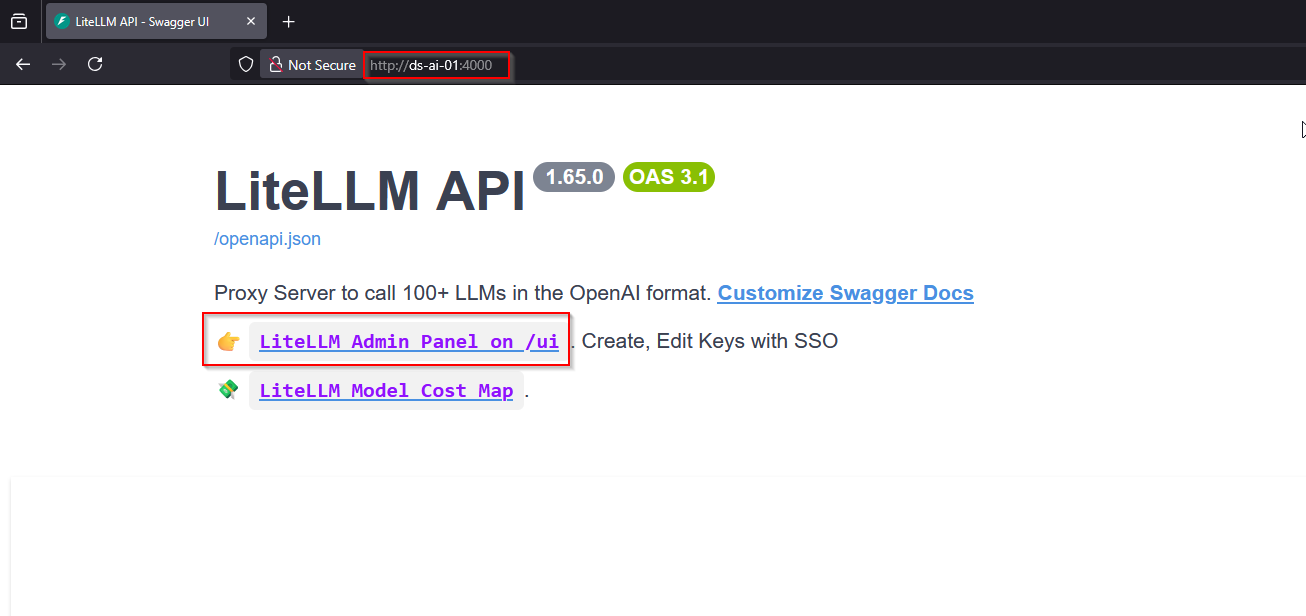
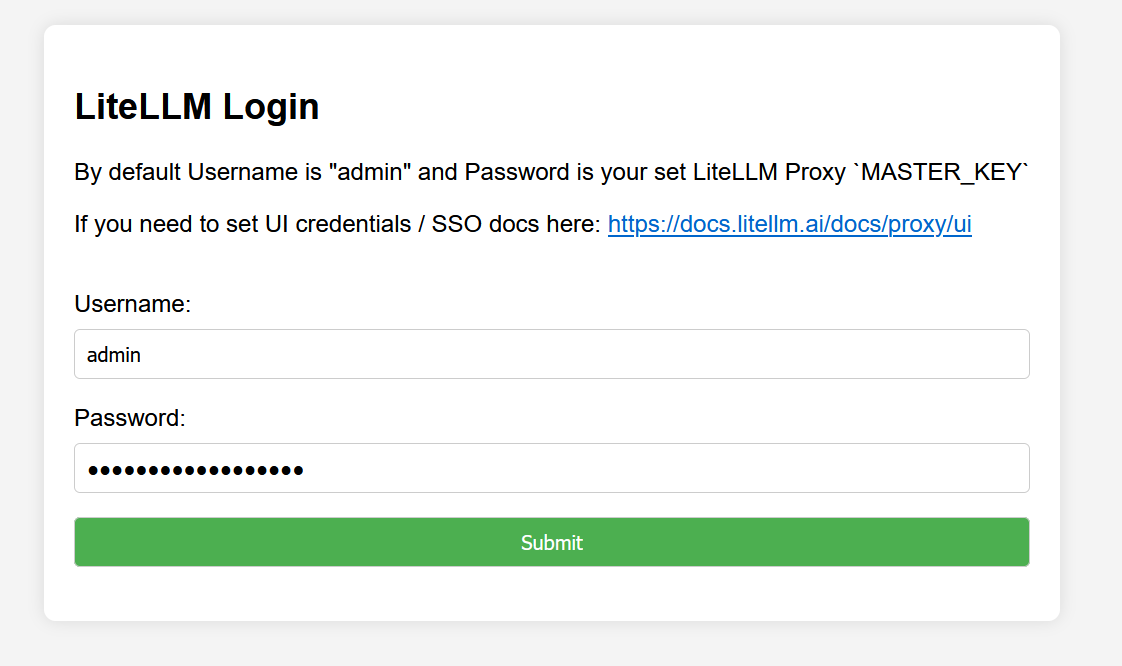
Note the port on the URL. Now click on the first link. You should be redirected to a login screen. The credentials are admin and the password is your master key from the .env file.
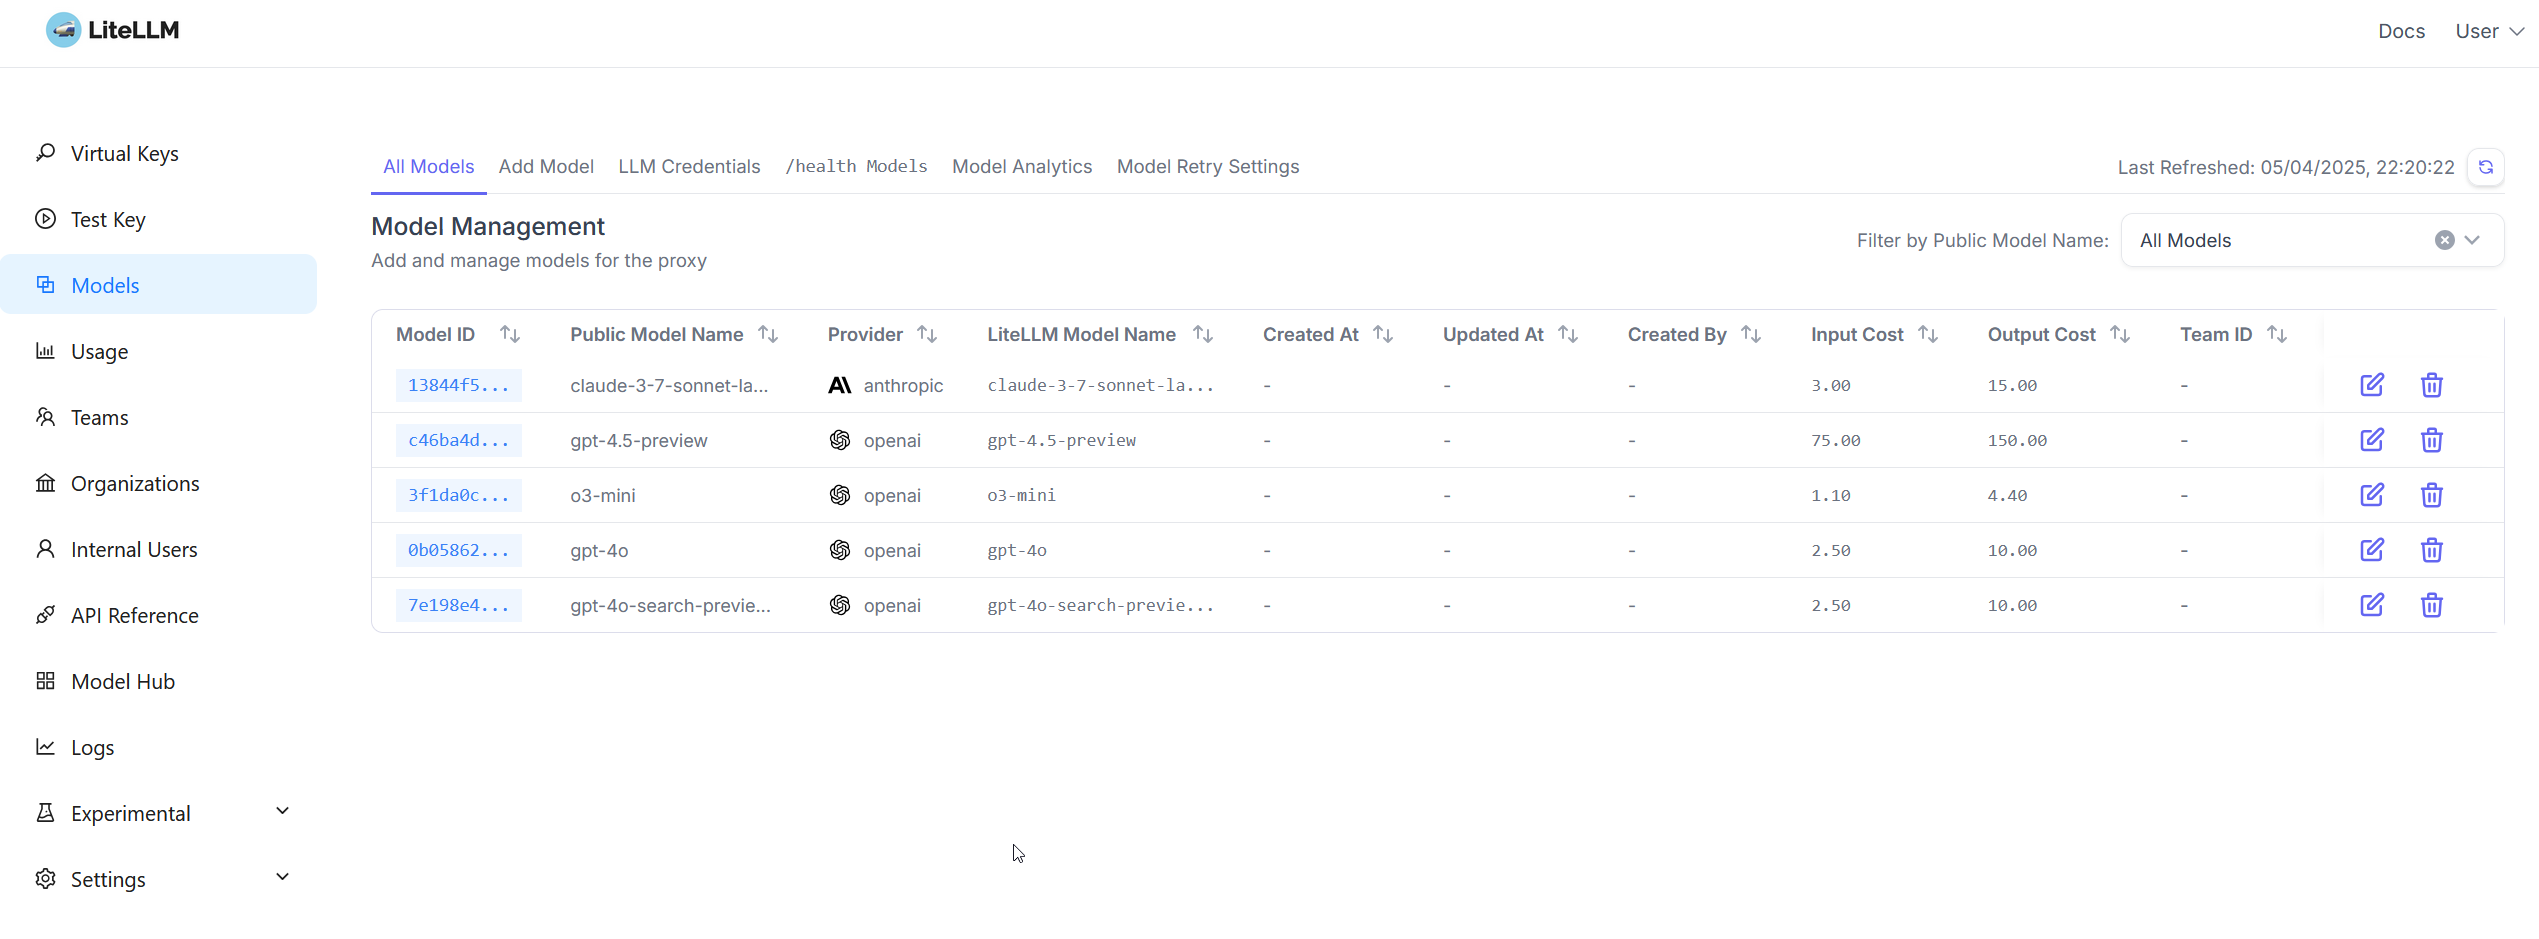
Once logged in, the first thing to do is to add the models you want to use. Here you will need an API key for the corresponding model's provider.
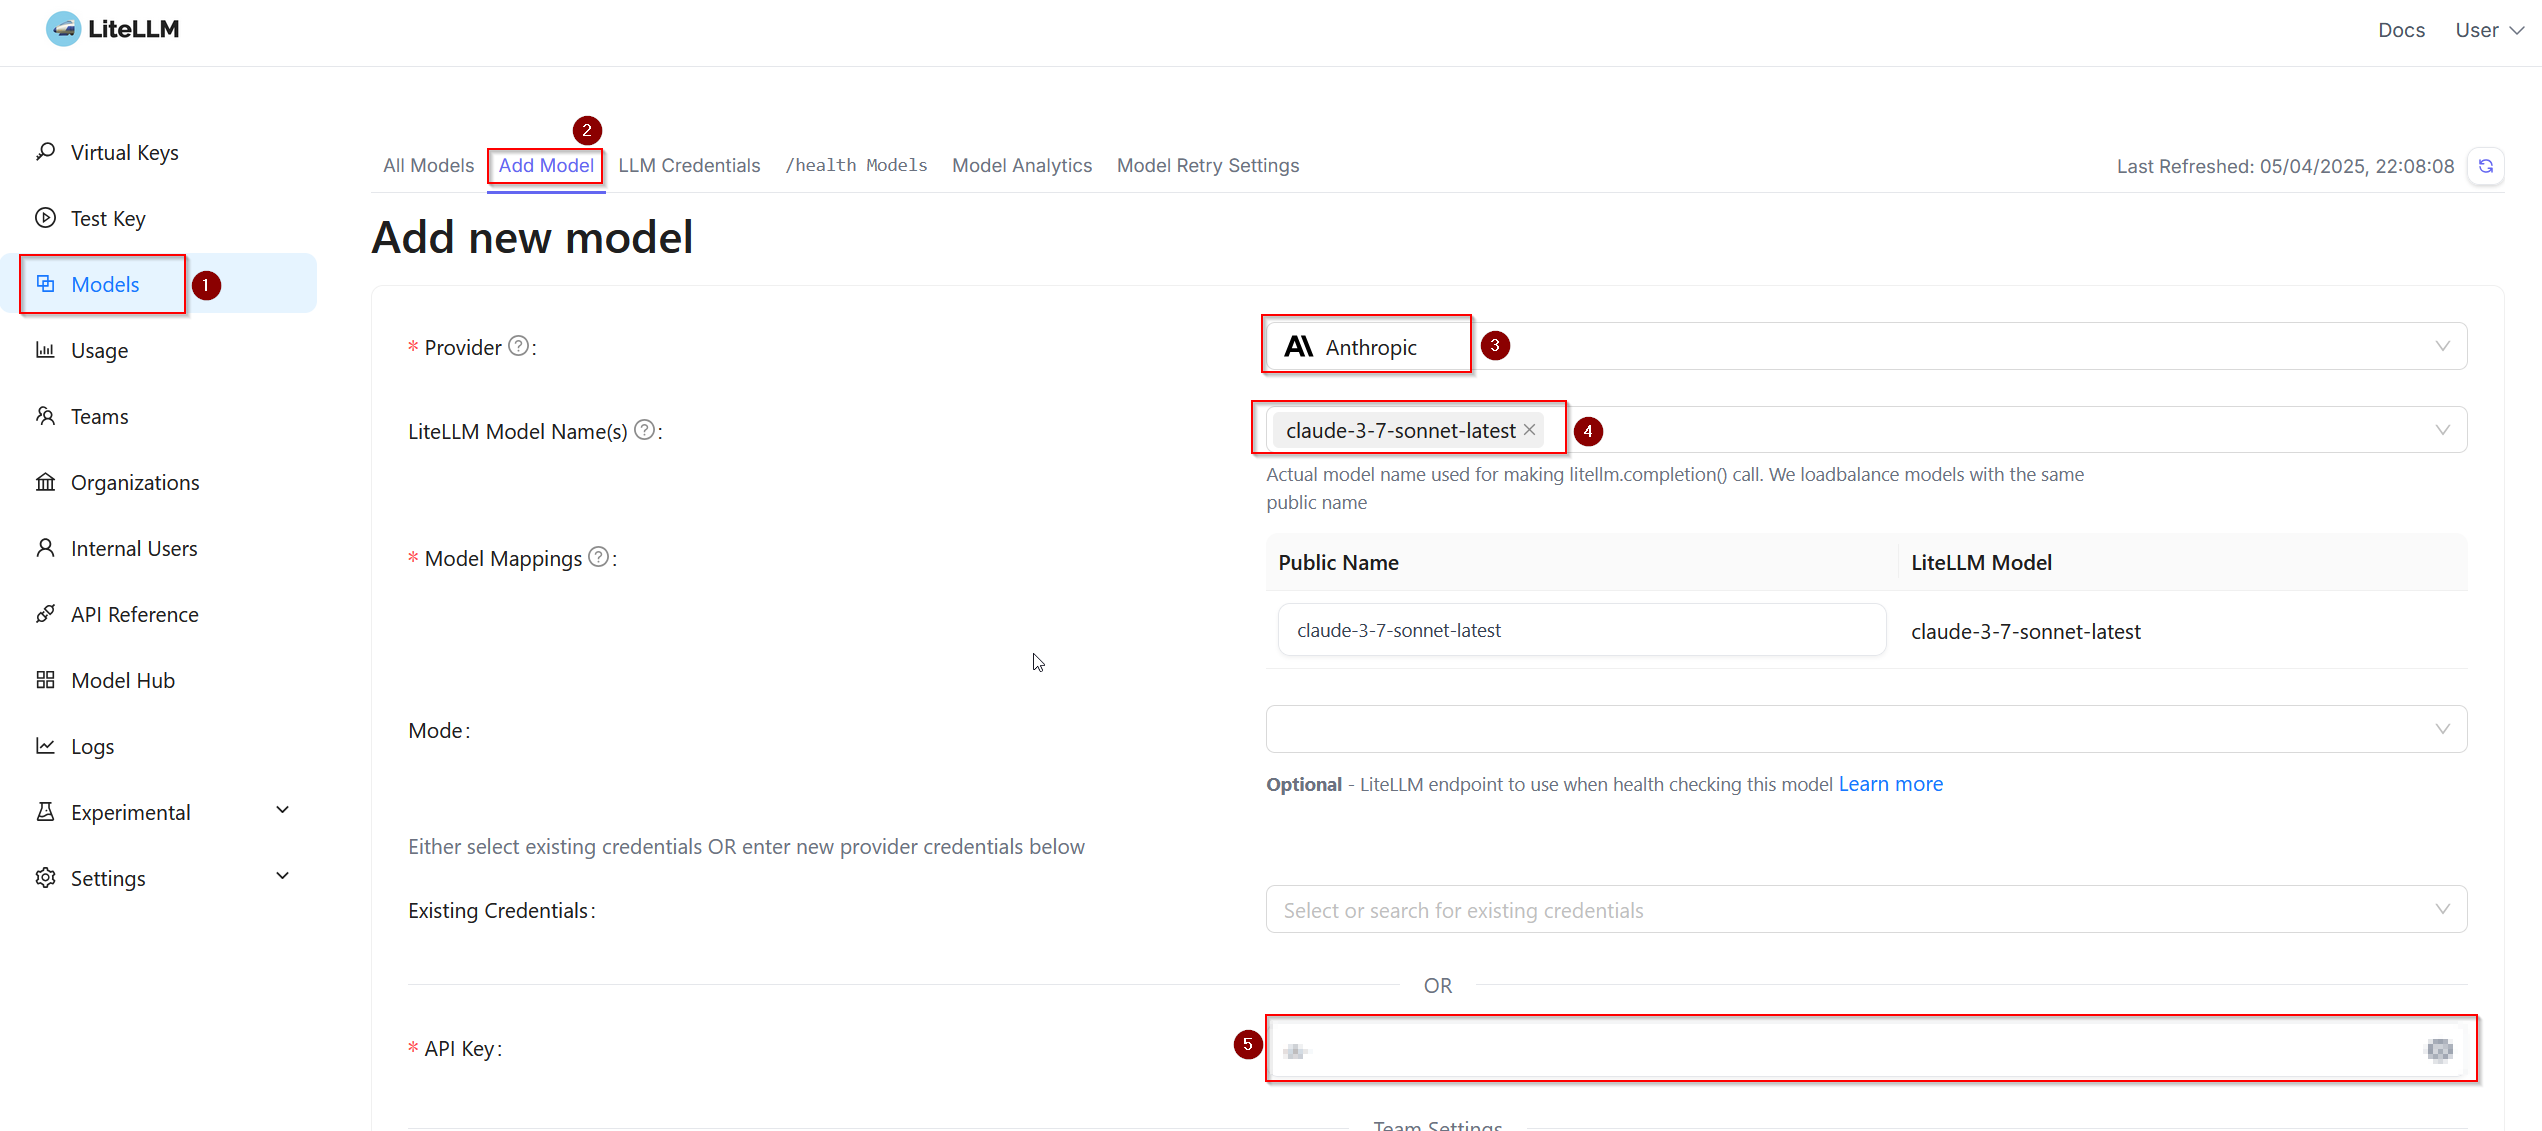
- Navigate to Models.
- Click on the Add Model tab.
- Select the provider.
- Select a model.
- Add the API for the corresponding provider.
- Click on Test Connect. If everything works, go ahead and click on Add Model.
In this example, I have selected the latest Claude model. Simply repeat this process for any other models you might wish to add. For this example, I will only add a few OpenAI models. Once you have added all your models, you can go back to the All Models tab and see all your models together with the associated costs.
Prices shown there are given in USD per million tokens.
Next, we need to create a new team.

- Navigate to Teams.
- Click on + Create New Team.
- Fill out the name of the team.
- Select the models you wish to make available to that team.
- Optionally, you can also set maximal budget.
The final step for this section is to add a virtual key, which will be needed when we set up Open WebUI.
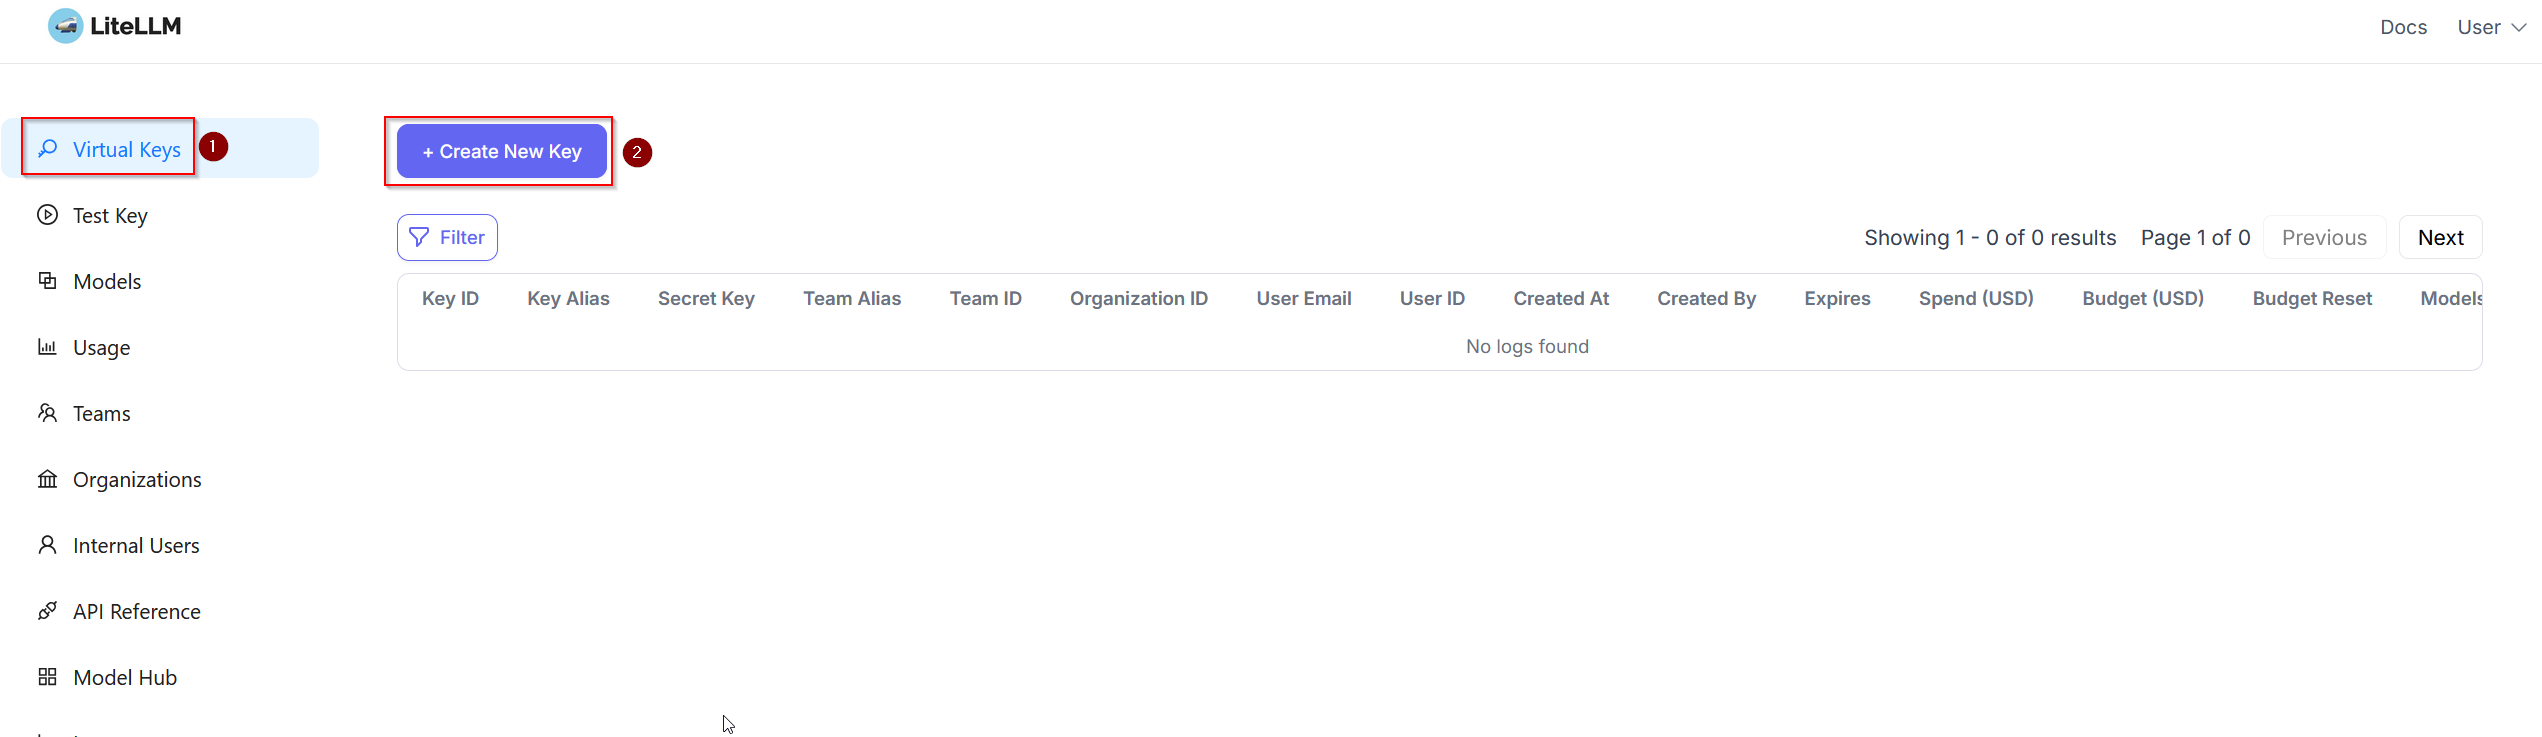

- Go to Virtual Keys.
- Click on + Create New Key.
- Select the team we just created from the drop-down.
- Enter a name to identify the API key.
- Select the models you wish to make available with this API key.
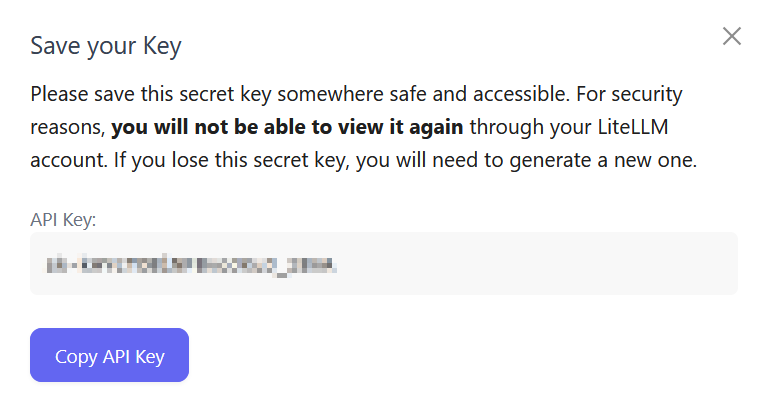
- Click on Create Key.
You should get this message together with your API key:
Open Web-UI
There are several ways to deploy Open Web-UI. I am not interested in running local models or using GPUs. I only want it to be able to speak to my LiteLLM instance. So I will use the most basic installation, namely the installation for OpenAI API Usage Only.
On your server, create a new directory and call it something like open_webui. Inside that directory you need to create a docker-compose.yml file:
services:
  open-webui:
    image: 'ghcr.io/open-webui/open-webui:main'
    restart: unless-stopped
    container_name: open-webui
    volumes:
      - 'open-webui:/app/backend/data'
    ports:
      - '3000:8080'

volumes:
  open-webui:
Once in place, simply run the following command:
docker compose up -d
When it is done pulling all images, you should be able to open your browser and navigate to the address of your server on port 3000 and you should see Open-WebUI.

Click on Get started. Fill out the registration for the first user.
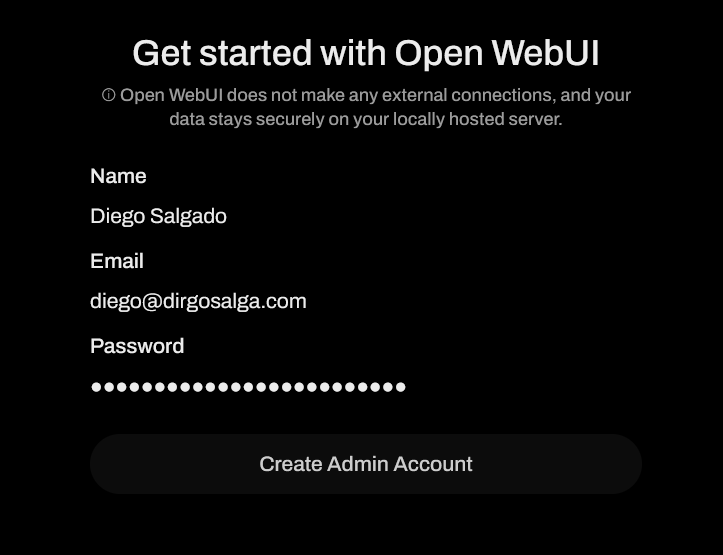
After the creation of the admin, you are redirected to the UI, which looks exactly like other sites such as those used by ChatGPT or Claude. As you can see below, at this point we do not have access to any models.
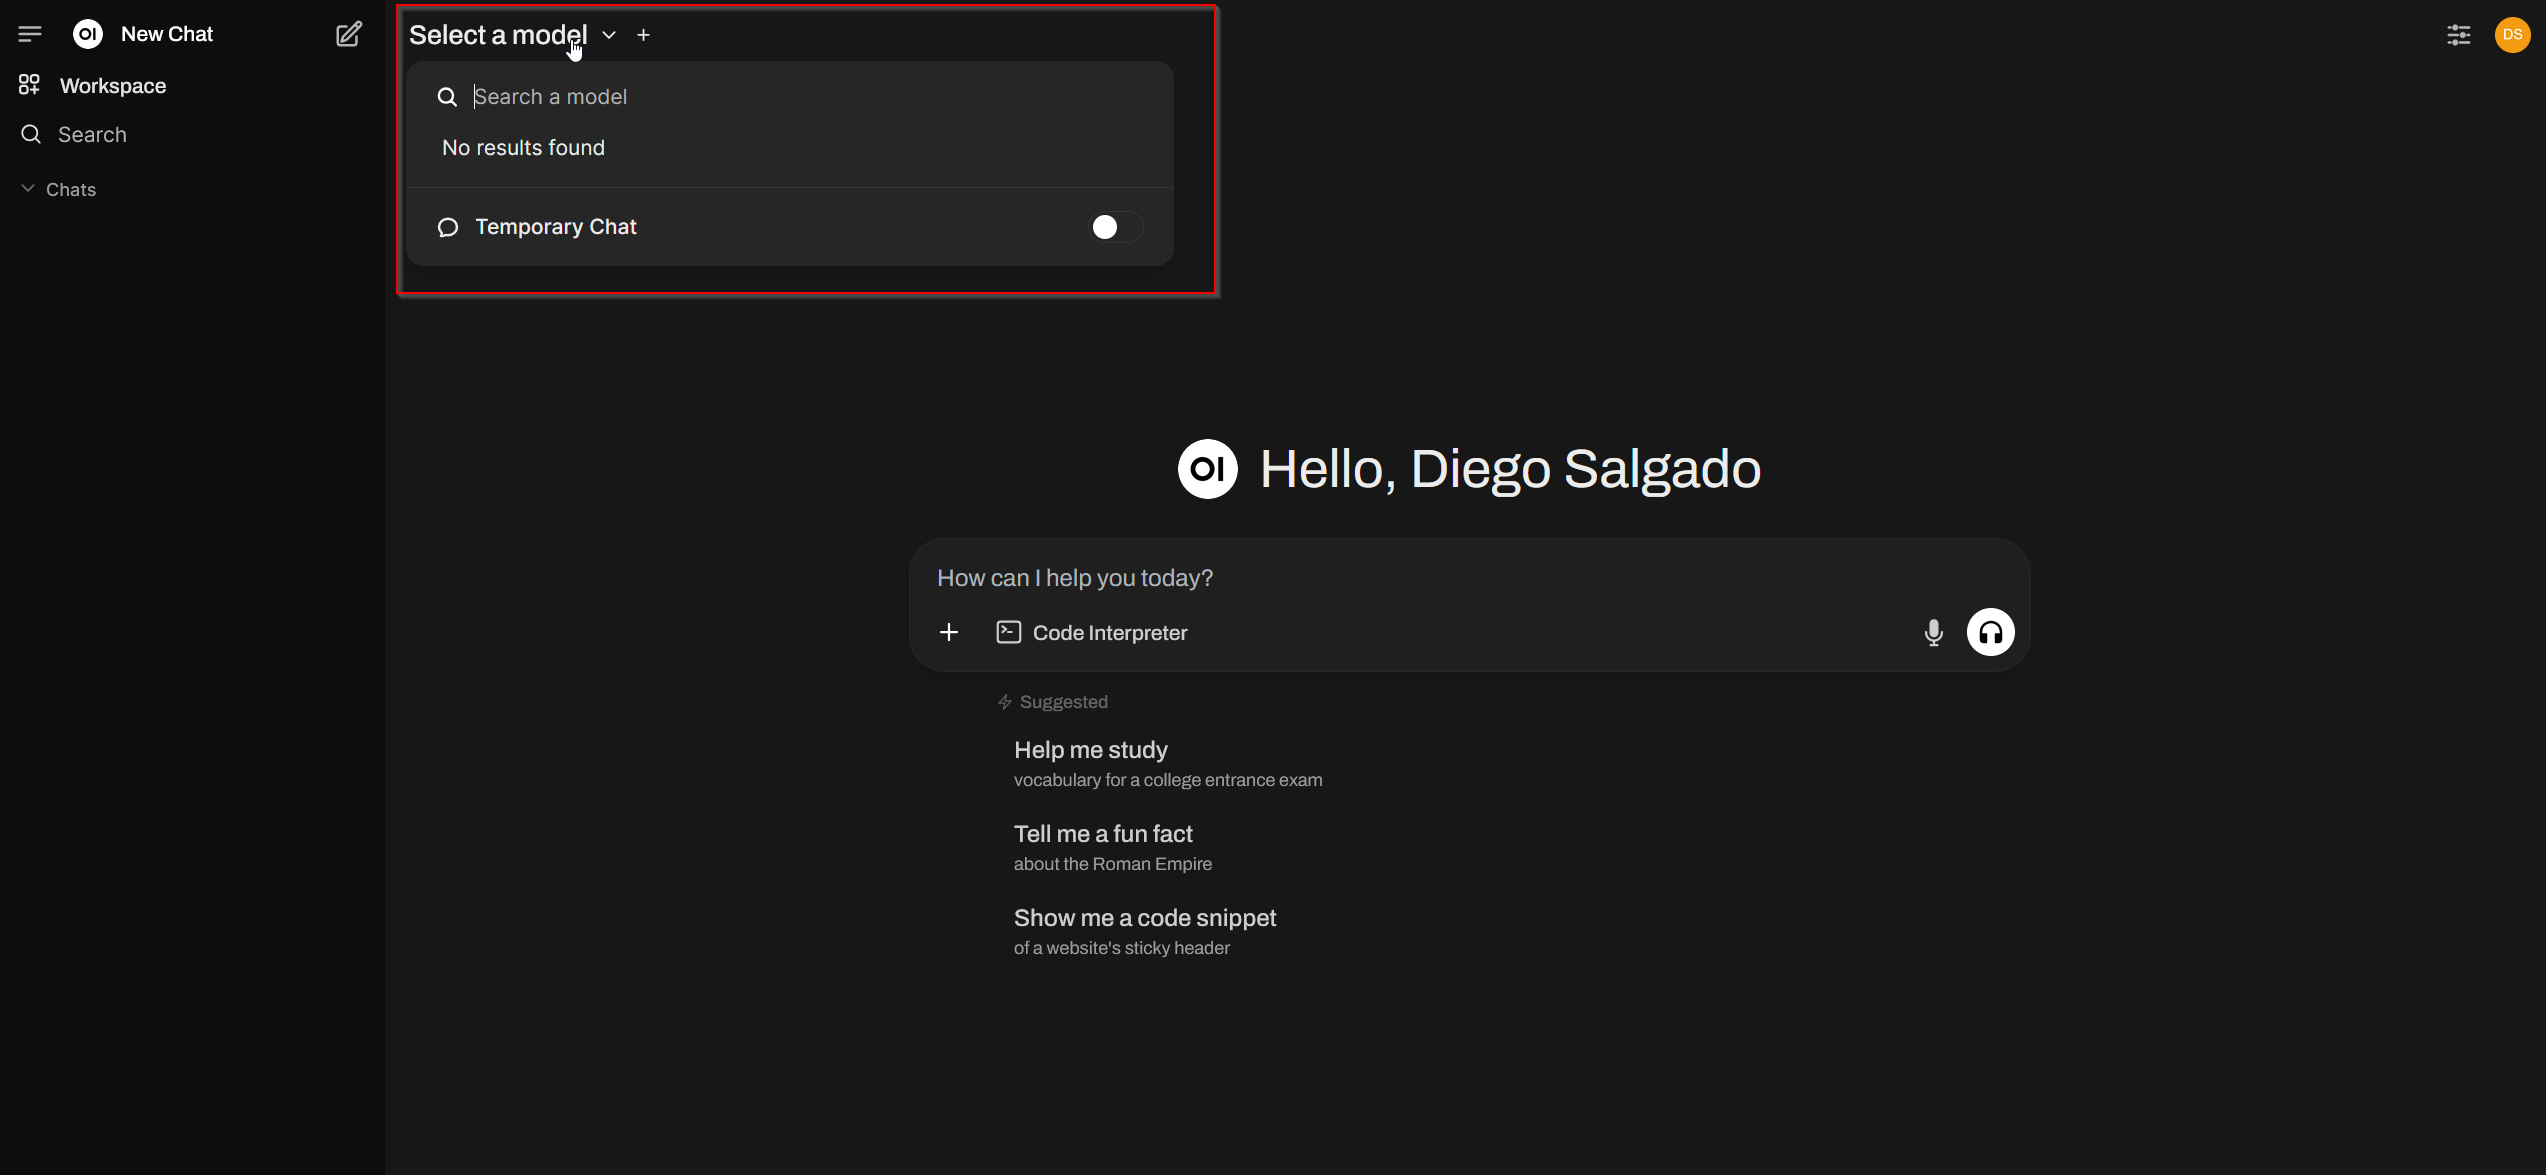
Let's fix that now!
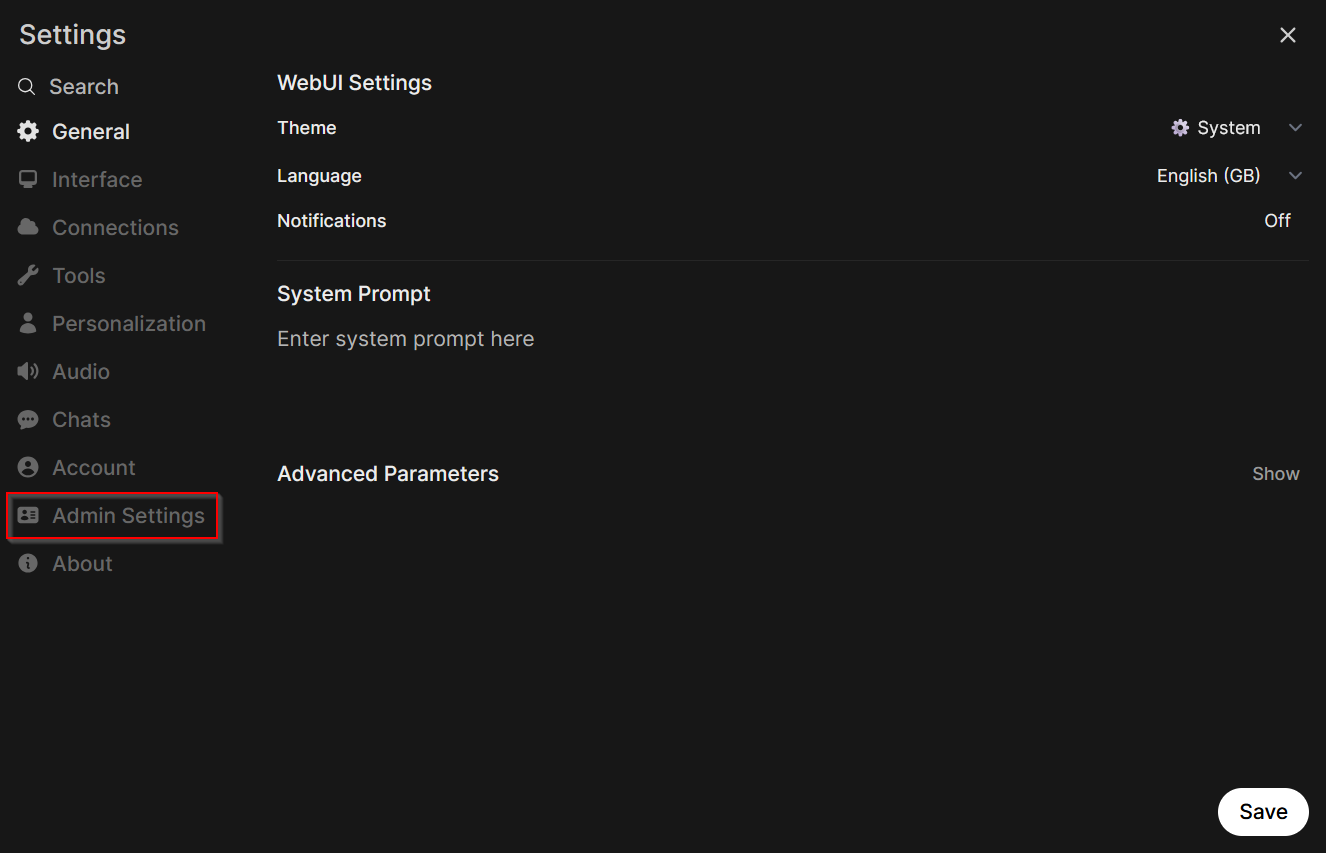
- Open the settings by clicking on your name at the bottom left.
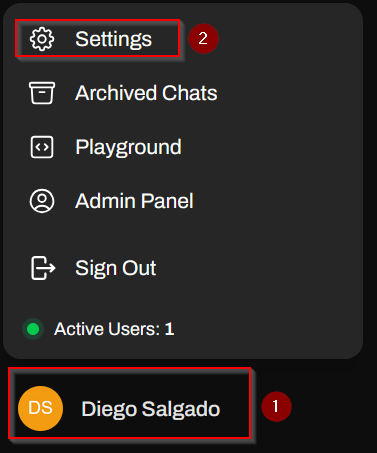
- Open the Admin Settings.
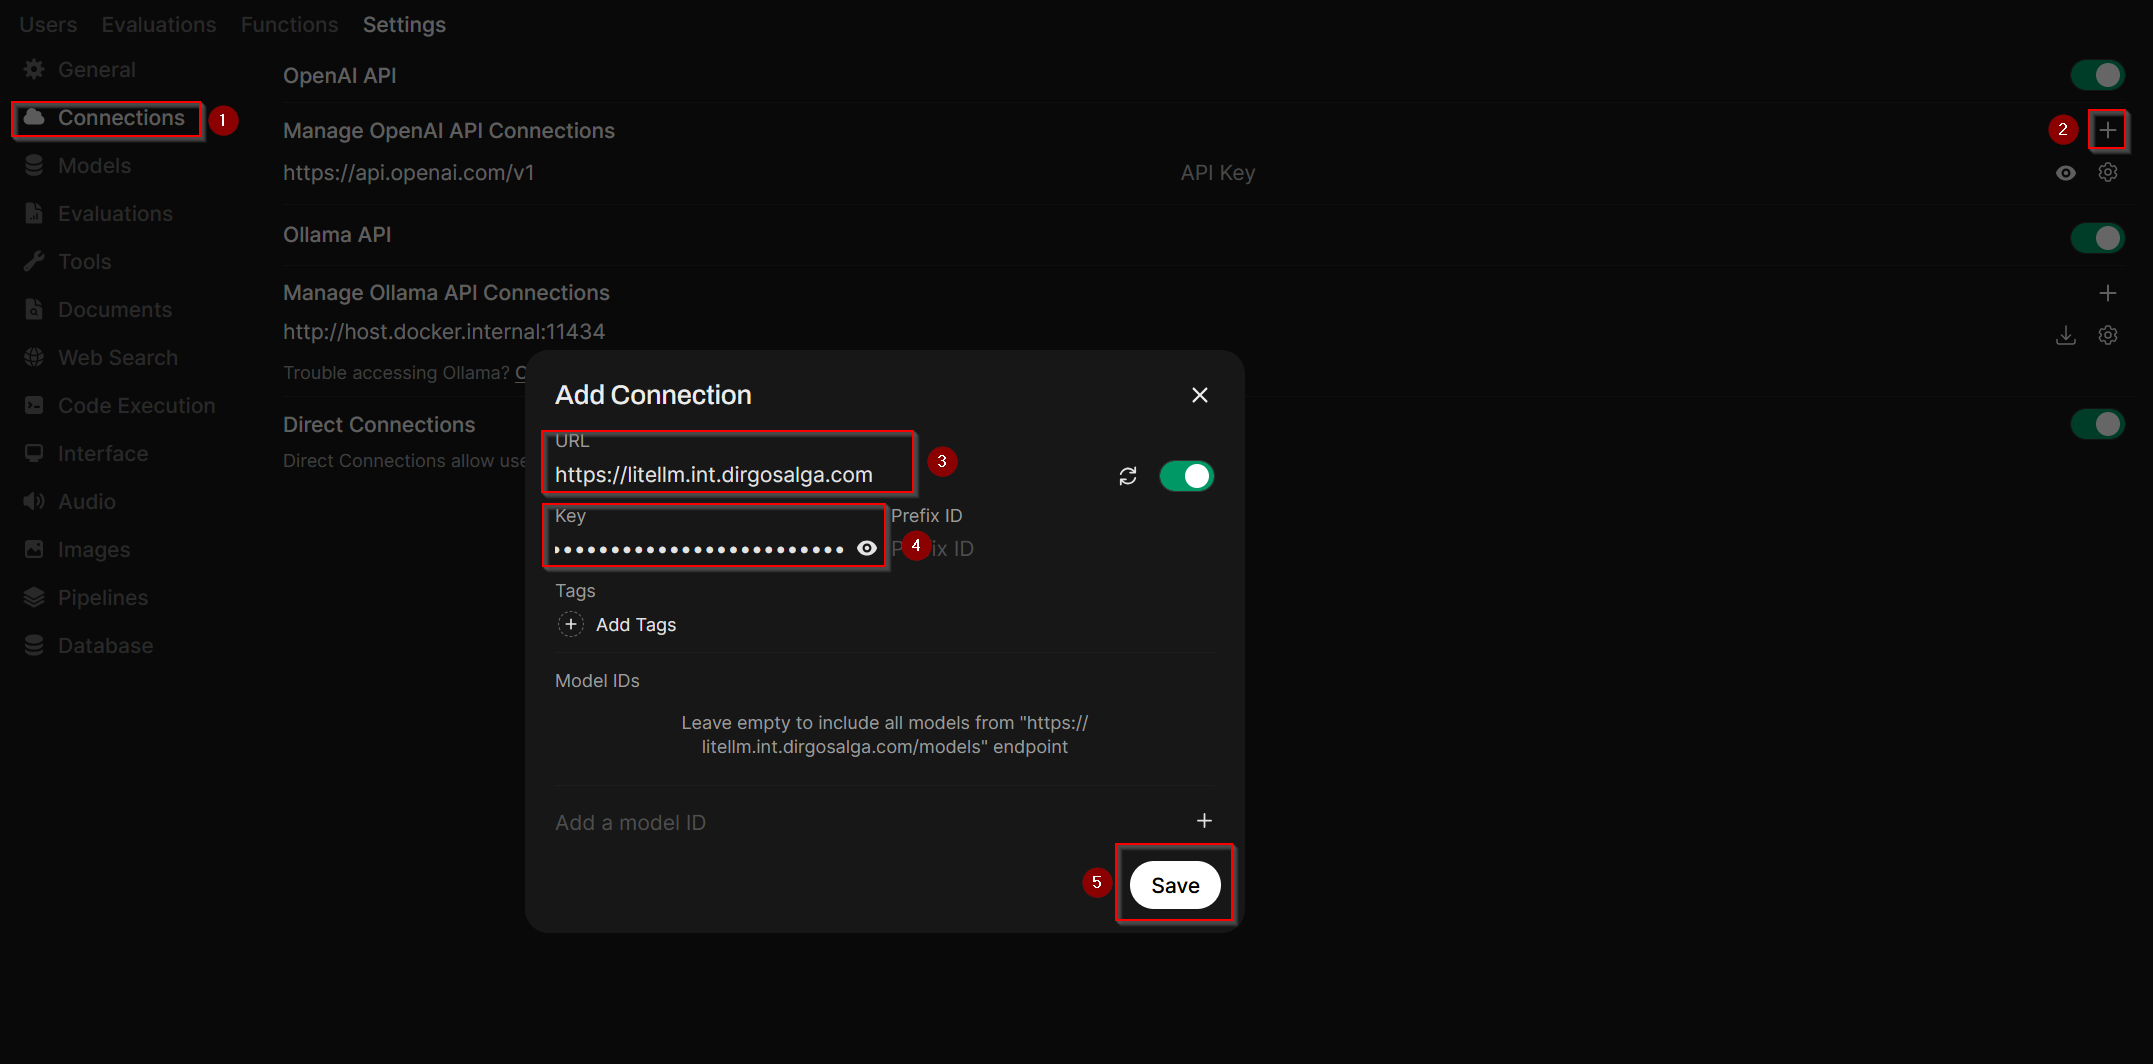
- Click on Connections.
- Add a new OpenAI API connection by clicking on the "+" sign.
- Enter the URL of your LiteLLM instance and the API key we created before.
- Verify the connection.
- Finally, click on Save.
Now, when you go back to the main page, you will see you have all the models you added before on LiteLLM.
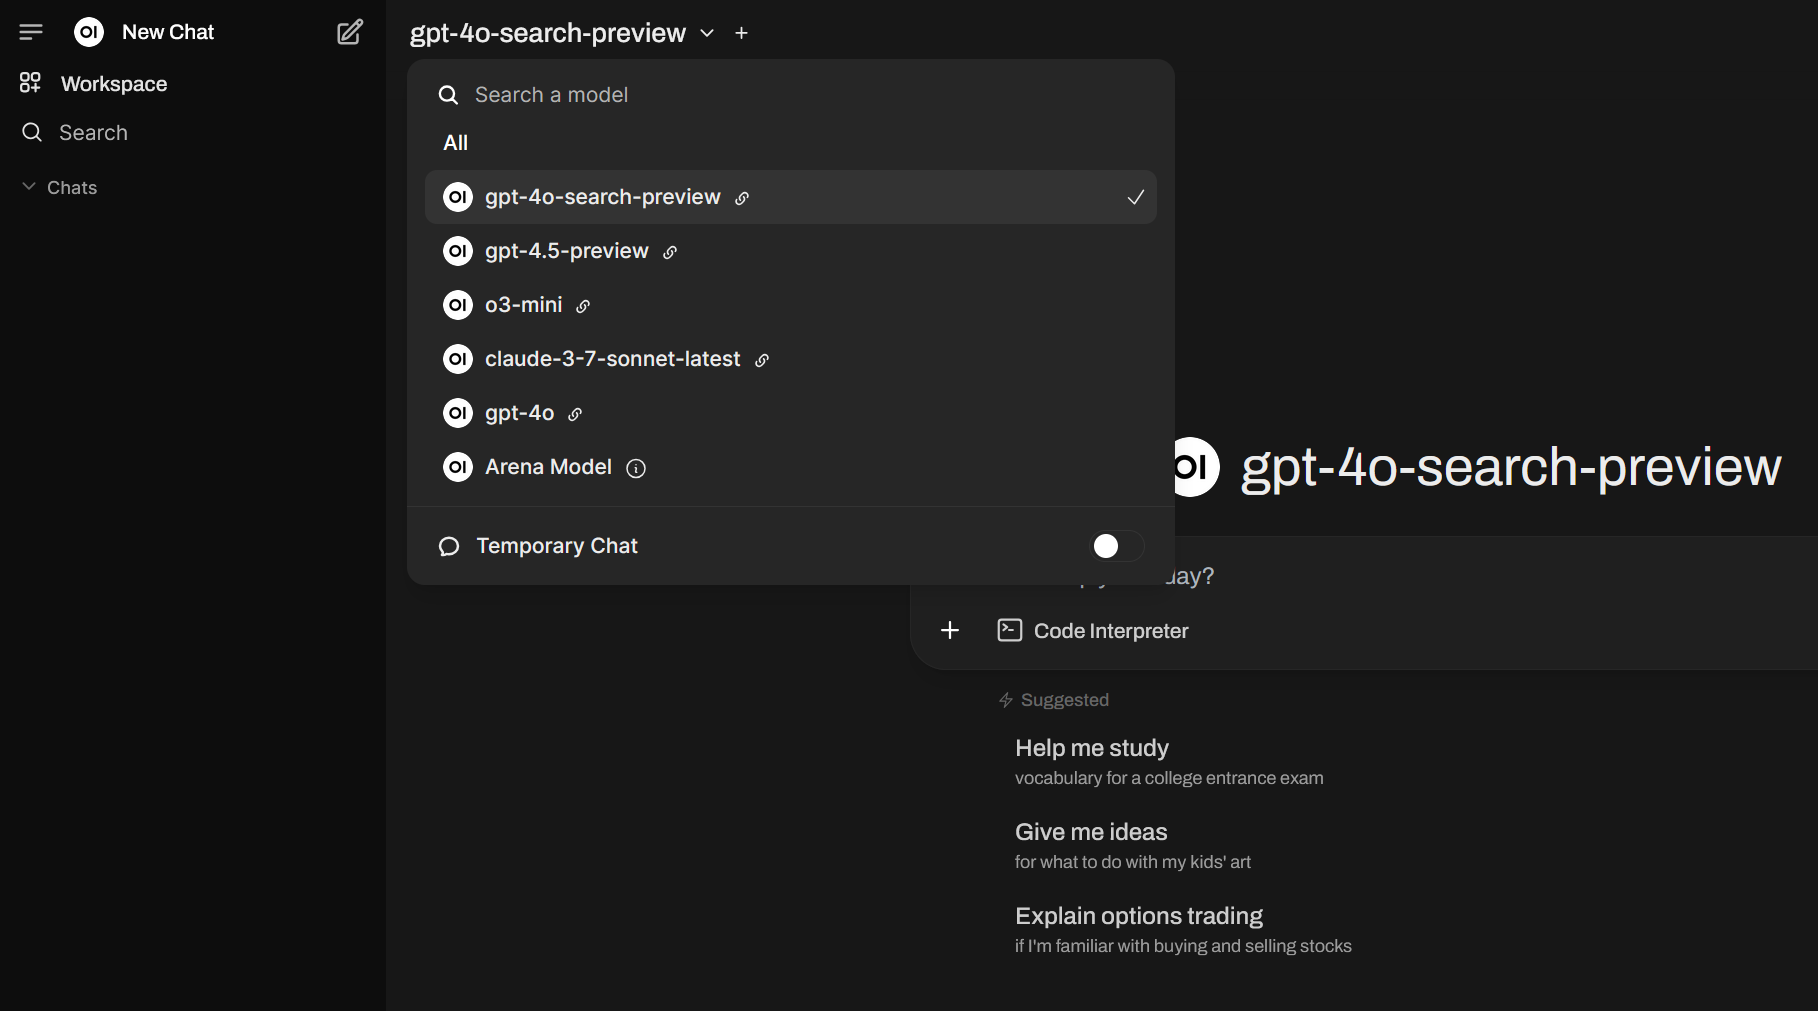
Added bonus
This is already great, if you ask me. We have access to several models from different providers (and the possibility to add many more, if we so wish). But there is one more trick. You can chat with two models at the same time by clicking the "+" sign next to the name of the model. This is a fantastic way to compare two models against each other for specific tasks and develop a sense of what models are most useful for a certain task.

Conclusion
Setting up my own web UI to interact with several LLMs and possibly saving some money is more than I could ask for. There is still one pretty huge elephant in the room that I have not addressed. Yes, all this is self-hosted. You can either run it on your own hardware or on a VPS in the cloud. I realize many might not be able to spin up their own server and have the possibility to access it through the internet from anywhere. If this is currently a limitation you are facing and you would like to get into self-hosting, stay tuned for future posts. I have been planning a self-hosting series of posts for some time now.
Let me know how and if you ended up using this in the comments. And if there are any other topics you would like me to cover, just let me know!